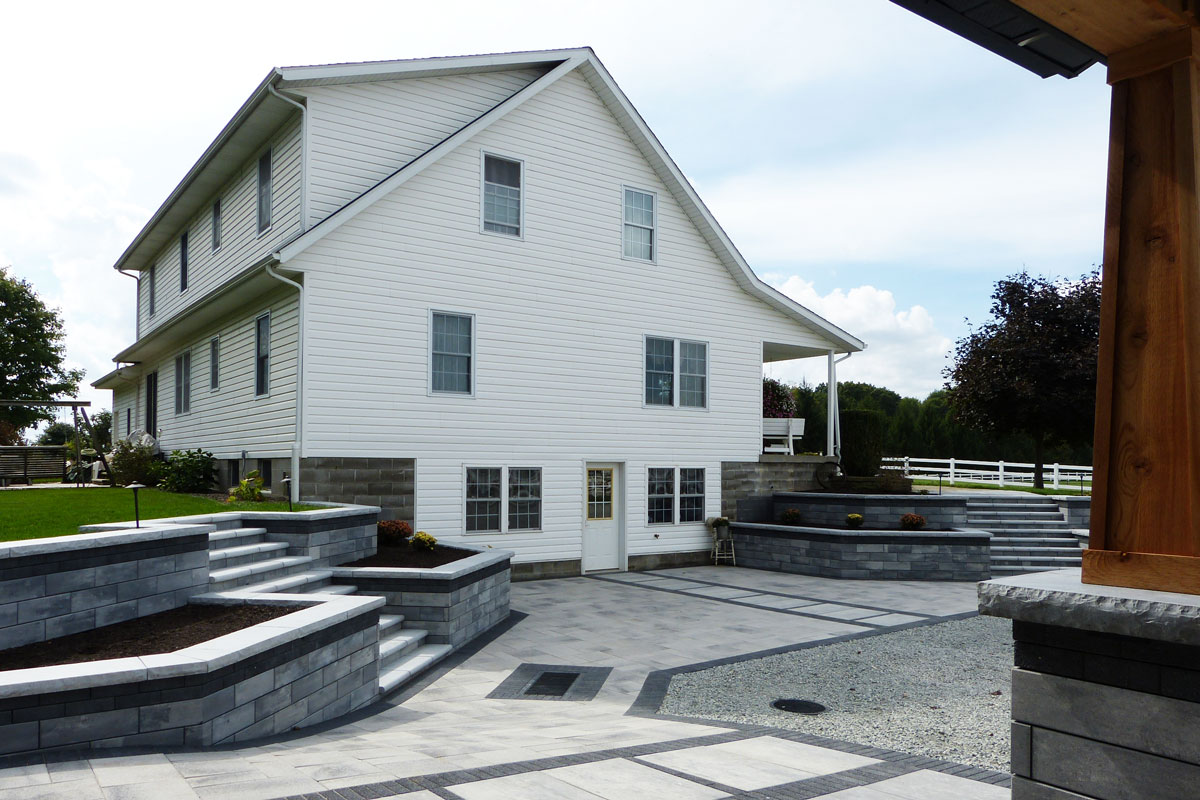
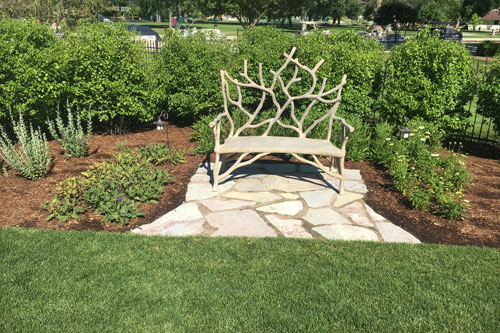
Your patio is a key part of your outdoor space. From relaxing to entertaining, there’s just something so special about having a patio you love. In many ways, a patio can feel like an extension of your indoor space—yet it comes with the flexibility of decorating it with plants, outdoor furniture, string lights, and a fire pit.
Keeping this precious area of your yard and home intact is common sense to homeowners who value their peace of mind and property value.
Want to know how to keep your patio in good shape for years to come? Well, that’s a step-by-step process that we’ll break down in this post.
Patio Maintenance: Preventing Problems Before They Start (General Maintenance)
What are the Essential Steps for Regular Patio Maintenance?
Understanding the process for regular patio maintenance slows down major patio repairs and resanding.
We recommend that you:
- Sweep debris off your patio regularly: fallen leaves, dirt, grass clippings, etc.
- After you’ve swept your patio, use a mild patio soap or detergent to rinse away stubborn pieces of dried dirt and prevent buildup.
- Inspect for cracks or movement in patio pavers or cement. This helps determine if your patio needs repairs before it’s too late.
- If you’ve found minor blemishes, reapply sand and sealant as needed to prevent further damage.
How Can I Prevent Common Patio Issues Like Cracking and Discoloration?
Aside from general maintenance, it’s important that you seal your patio every 3–5 years.
Sure, your patio might not look like it needs to be resealed, but the best way to test this is to pour a little water on it.
If the water forms little individual droplets, then your patio is still sealed properly. But if the water quickly soaks in, then it’s time for a fresh coat of sealant.
Our best advice is:
- Use polymeric sand to lock pavers in place. This is water resistant and helps your patio stay in shape longer.
- Clean spills immediately to avoid staining. Don’t let food, drinks, or muddy water sit on your patio too long. Prevention is better than repairs in the long run.


What Causes Discoloration on Patios?
If you want to keep your patio in tip-top shape, avoid discoloring the pavers as much as possible.
Organic debris—like leaves, algae, and dirt—are quick to collect on patio surfaces, but not as fun to clean off. When swept off immediately, organic debris won’t stain. But if left behind for too long, they leave unpleasant dark spots on your patio.
Rust from furniture or grill sets is another thing to keep your eye on. Covering your metal furniture and grill will help prevent rusty stains on your patio. Moving these pieces to a garage or indoor space close by is even better.
Sunlight and moisture imbalance are factors some people don’t consider when they think of patio discoloration. However, overexposure to sunlight can fade areas of your patio, so adding a pavilion or sunshades overhead might be the best choice if you want to retain your patio’s original color. Another thing is too much water will create dark spots on your patio. It’s not always possible to shield your patio from rain, but if you spill a glass of water or have a garden hose running near your patio, make sure you’re not allowing there to be resting water in just one area of your patio.
What Causes Cracking?
In Mid-Western climates, changing temperatures are a given.
This means your patio will go through:
- Freeze-thaw cycles: freezing temperatures, snow, and ice during the winter, then melting ice and snow in the springtime/
- Poor drainage: snow piled up on or around your patio starts melting and soaking into your patio and surrounding landscape.
- Shifting or erosion: snow and ice can cause your patio pavers to shift and hail and sleet can cause erosion.
While you can’t avoid changes in weather, you can maintain your patio during the winter by shoveling it off occasionally.
What are the Best Practices for Cleaning Different Materials?
In spring and summer months, here’s a quick overview of how to keep your patio clean:
- Pavers: Pressure wash gently or use a garden hose with a spray nozzle attachment; avoid dislodging sand between joints as you clean.
- Natural stone: Use stone-safe pH-neutral cleaners. Natural stone also needs special attention to each stone when cleaning.
Find the materials that work best for your patio and take before and after photos to document your results!
How Often Should I Inspect my Patio for Damage?
How often you inspect your patio depends on the region you live in.
Because our area of the Midwest goes through four seasons, we suggest performing seasonal inspections (4x per year).
Check your patio as seasons change. Make sure pavers are still in place, clean as needed, and perform sanding touch-ups when necessary.
After severe weather events like tornadoes, hail, sleet, rainstorms, and windstorms, move any debris off the surface of your patio to stop erosion or staining.
Weed and Moss Control
How Can I Remove Weeds Without Pulling up Pavers?
Use boiling water, vinegar-based sprays, or polymeric sand to choke out weeds without displacing your patio’s pavers.
Boiling water softens dirt around the root of plants, vinegar kills weeds, and polymeric sand can choke weeds out.
Finding the right method can depend on the time of year and how much time you have to remove weeds. Make a check list to make sure you have everything you need (bucket, wheelbarrow, etc.) before you start removing weeds.
How Can I Prevent Moss and Algae Growth?
If your patio is near a pool or pond, sometimes moss and algae can crop up.
For these areas, try to:
- Ensure proper drainage: a sloped edge along the side of your patio helps water drain off instead of sitting stagnant.
- Clean regularly: mop up wet spots with a towel and sweep after using the patio.
- Apply a moss inhibitor or diluted bleach solution (spot-tested). Use diluted vinegar solution for natural moss removal.
Are There Eco-friendly Options?
Aside from vinegar-based solutions, baking soda, and boiling water are chemical-free weed and moss treatments you can use to clean moss and algae off your patio.
Seasonal Care
How Do I Prep my Patio for Different Seasons?
In a snapshot, here’s what preparing your patio for seasonal changes looks like:
• Spring/Summer: Clean, inspect, seal (DIY or professional care).
• Fall: Remove debris, trim surrounding plants, cover with tarp.
• Winter: Avoid harsh salts; cover furniture, grill, and fire pit or fireplace.
Remember, taking care of your patio regularly is what keeps your pavers, bricks, stones, and cement in the best condition.
Something that’s different about winter maintenance is to make sure you shovel snow carefully to avoid chipping pavers and using calcium chloride over rock salt to melt snow and ice.
If you’re trying to protect from extreme weather, seal joints and surfaces while the weather is still warm. Then, maintain proper grading and drainage and cover the patio when not it’s in use for long periods.
Patio Restoration: Bring It Back to Life
Identifying the Need
What are the signs I need patio restoration?
Looking for signs your patio needs more than seasonal maintenance?
Here’s our checklist:
- Loose or uneven pavers: pavers are slanted or rock back and forth when pushed.
- Faded color and stains: dark or light spots that can’t be rinsed or scrubbed off.
- Sand erosion and frequent weed growth: worn down or overgrown patio.
You can check structural integrity by:
- Look for sinking pavers or pooling water.
- Tap pavers to detect “hollowness.”
- Check for shifting at the edges of your patio.
Restoration Techniques
What’s Involved in Restoration?
Patio restoration looks different for every homeowner, but the typical process includes:
- Deep cleaning: power washing pavers or pavement
- Removing damaged pavers or bricks and replacing.
- Leveling the base of your patio.
- Resanding and resealing to protect from further damage.
Can I DIY or Should I Hire a Pro?
DIY is possible for minor patio fixes. For full restoration, professional services ensure long-lasting results with proper tools and materials.
Either way, here are the materials that are needed:
- Polymeric sand
- Sealers (matte, semi-gloss, or high-gloss)
- Joint stabilizer
- Leveling base materials (gravel, sand)
Where to Find Materials for Patio Restoration?
If you’re going the DIY route to restore your patio, you can look for supplies at Local hardware stores, landscape supply centers, or through contractors like Premiere Aquascapes.
Cost and Time for Patio Restoration
What influences patio restoration cost?
There’s not a set cost for patio restoration since everyone’s patio area is unique.
When we provide a quote for patio restoration, we look at:
- Size of patio
- Severity of damage
- Type of materials
- Labor rates
The average cost for patio restoration is between $3–$12 per square foot, but fill out our Service Request form to get a more accurate estimate.
Typically, once your patio restoration is scheduled, it takes 1–2 days for full restoration.
Patio Resanding: Small Step, Big Impact
As a refresher, here’s the difference between maintenance, resanding, and restoration.
- Maintenance: Ongoing cleaning and inspections.
- Resanding: Replacing joint sand to stabilize pavers.
- Restoration: Full surface rehab (cleaning, leveling, resealing).
Resanding Is Important because it (1) keeps pavers locked in place, (2) prevents weed growth and ant infestation, (3) supports water drainage.
Resanding also improves the life of your patio by reducing movement and erosion and protecting joint integrity.

Resanding Process
DIY resanding is manageable for small areas. On the other hand, pros ensure proper compaction and sand setting.
Here are steps to resand pavers:
- Remove old joint sand.
- Sweep new polymeric sand into joints.
- Compact the surface.
- Activate with water misting.
- Allow to set without walking/traffic.
You’ll need Polymeric sand (binds when wet, resists erosion) or masonry sand (cheaper, but washes away faster).
To make the process go smoothly, make sure you have a broom, leaf blower, compactor, hose or sprayer.
Wet sanding activates polymeric sand for sealing and dry sanding is used for temporary fills.
Common mistakes to avoid when resanding are:
- Overwatering polymeric sand.
- Not compacting before sealing.
- Using incompatible sand types.
To ensure proper setting, follow manufacturer’s instructions for the sand you’re using and make sure it’s not predicted to rain for 24 hours after application.
Extra Tips & Best Practices
Wondering how to enhance your patio’s appearance?
Here’s some tips from the pros:
1. Seal with a glossy finish: keeps patio bright and elegant.
2. Add lighting and borders: makes for a warm, welcoming environment.
3. Integrate landscaping elements (mulch, plants, edging): adds beauty and charm to your outdoor area.
Sealing your patio also:
- Enhances color – makes natural stone, brick, or pavers pop.
- Protects from stains and UV rays – less fading over time.
- Locks sand in place – weather and erosion resistant.
Sometimes, there are local regulations to consider before you start working on your patio. Make sure to check for HOA rules and drainage codes before restoration.
Aside from sealing your patio softscaping—like trees and flowers—complements hardscaping—your patio, outdoor kitchen, pavilion, and more!
Plants and trees also prevent erosion and control runoff around your patio.
Final Thoughts
Whether your patio just needs a little TLC or a complete refresh, staying on top of patio maintenance, resanding, and restoration is a must for homeowners who love the outdoors.
And you can do it yourself or hire a pro to do the heavy lifting for you.
For peace of mind and professional-grade results, consider partnering with us at Premiere Aquascapes. We love helping people love their outdoor space even more. Call us today at 574-202-1636 or fill out our Service Request form to help your patio reach its full potential!